As soon as Microsoft released its latest OS, Windows 7, being a technician I started getting e-mails & calls from a bunch of people who wanted to get install this new operating system on their PC. I was a big fan of Windows XP (before Windows 7 release) and always believed that nothing can be better than XP. That is the reason, why I never tried using Windows Vista. So I’ve decided to do a complete research on
Windows 7 before I wipe out my XP and install it on my PC. On completion, I found that Microsoft has done a great job. The latest Windows 7 is far better than Windows Vista and has a number of improved features.
Though,
Windows 7 is a comprehensive OS, however, there are still few limitations which I’ll discuss later most probably at the end of my blog.
Windows 7 doesn’t allow you to perform upgrade also known as in-place upgrade, if you are currently running Windows XP. So does it mean you’ll have wiped out all your data? Not at all! Windows XP users can migrate to Windows 7 but they have to complete a little exercise. Windows 7 includes a Migration utility for XP users so before performing a clean installation, you must backup of your data and settings by using
Windows 7 migration tool. On the other hand, existing users of Windows Vista have an advantage of in-place upgrade.
Being an XP user, I’m writing these general steps, which will help you in performing clean installation of Windows 7 on your XP PC.
Note: Before you start installing Windows 7, I would like to suggest you few things, which you must verify, such as, minimum hardware requirements to run Windows 7, availability of device drivers, a valid product key and which version to install. If you know the answers of above mentioned questions, you are on the right track.
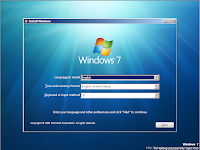
Here are the instructions that you can follow while installing Windows 7:STEP 1. Insert the Windows 7 setup disc into computer’s DVD/CD drive and boot from it.
STEP 2. On the “Install Windows” page click on Install now.
STEP 4. Read the “License term” page and accept it by clicking on “I accept”.
STEP 5. Select “Custom installation type” on the next page (Recommended).
STEP 6. Install Windows on a specific partition if you’ve created one.
STEP 7. After that you will notice Installing Windows 7 screen. The setup will proceed further and take several minutes to copy files, expand files, install features, install updates and complete the installation. Do not interrupt in between the process. Enter your user & computer name when prompted then select next. Enter your serial Key. Select your update settings. Change Time & Date settings if require then select your Wireless network from the list and security key if applicable.
STEP 8. On a successful installation, run Windows 7 migration tool and install Windows XP data and settings.
Features There is a wide range of features, which have been added by Microsoft, thus giving you the reason to opt for new Windows 7. Some of its extraordinary features are: Libraries, Multi-touch technology, Instant search, Remote Media Streaming, Windows XP mode and many more.
Usability There is no doubt that Windows 7 is more than an operating system. Its unique features and various editions will be definitely appreciated by the Microsoft consumers. This time it’s fast, secure, reliable and stylish and most importantly compatible with most of the hardware & software pieces unlike Windows Vista.
LimitationHowever, there are certain limitations of
Windows 7 that you must be aware of. At first in order to install Windows 7, your PC needs to be a powerful machine that is why most of the people may avoid installing this latest OS. It’s been reported that your favorite XP compatible programs might not work in
Windows 7 environment. This is the reason that Microsoft has added XP mode feature. There are total six editions of Windows 7 out of which only three are available across the globe. Due to the total new GUI, you might take some time to get familiar with it.


